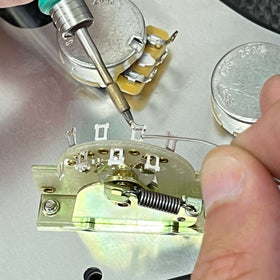
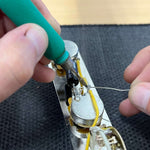
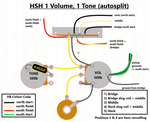
No thrills, no shrills. Welcome to our step by step guide to wiring a standard Precision Bass. There is a video in conjunction with this guide and we recommend that you watch the video and study the wiring diagram before starting.
Did You Know?
In the late 40s and early 50s, the growth and popularity of the electric guitar and microphones meant that live performing double bass players were often drowned out. Double basses were very clunky and big and were played upright. To fix this, Leo Fender invented the electric bass – he based the body shape on his recent Telecaster design and added frets and a pickup – a bassist could now play notes with precision and wouldn’t be drowned out in a live situation.

You Will Need
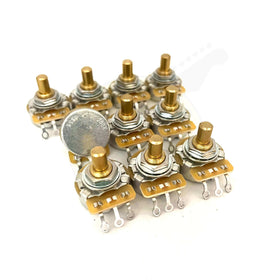
- Precision Bass Wiring Kit (2 x CTS 250k solid shaft pots, 1 x 0.047uF capacitor, ¼'' Switchcraft jack socket, push back cloth wire)
- Precision Bass pickguard
- 60w soldering iron (preferably temperature adjustable)
- Tinned copper bus wire (optional)
- 3.2mm heat shrink tubing (optional)
This guide will show two methods of wiring the Precision Bass - one with cloth wire, one with braided wire.
Preparation
The key to soldering is heat transfer – ensure that your soldering iron is tinned and cleaned throughout the process. You also need to tin the terminals and wire ends that need a solder connection. Tinning helps create a more secure mechanical connection and therefore a better electrical connection.
Step One
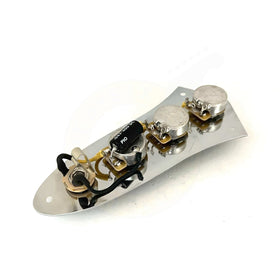
Assemble the two CTS pots and Switchcraft jack socket into the pickguard as per the below photo. The solder lugs of the two pots need to be facing each other.

Step Two: Grounding
Start off by grounding the lug on the volume control that won’t be used (third lug). Either use a snippet of wire connecting the lug to the back of the pot casing, or simply bend the lug back and solder it in place. Either way works the same.

A grounded volume pot lug. Filing the eyelet before bending it back onto the pot casing creates a bridge of solder between the two when we re-heat it. Not everyone likes this method, in which case, take an off-cut of wire and do it that way instead if you prefer.

Next, tin the sides of each pot – we will lay a ground wire connecting the two pots together. You can use either tinned copper or cloth wire. In the photo below we have used tinned copper. It is really recommended you ground the pots together - the problem with relying on the aluminium foil that comes on all pickguards is that it is very thin and wears away quicker than you think. The serrated teeth of the lock washer can cut through the foil onto the plastic over time. Adding this wire reinforces the ground connection.

Step Three: Volume and Tone Controls
Connecting the volume and tone controls together is simple. Use a small length of cloth wire and solder it into the input lug (1st lug) of the volume pot. Then solder the other end of the wire to the lug of the tone pot directly opposite.

Step Four: The Capacitor
For your capacitor, use a 0.047uF – it doesn’t matter if it’s paper in oil or foil, they all sound the same. Our wiring kit comes with a 0.047uF orange drop or you can upgrade to the paper in oil version. The capacitor goes on the tone pot. Solder one lead into the middle lug (output) of the tone control. The other lead needs to go to ground so solder it to the top of the pot casing.

Step Five: Jack Socket
Now we need to wire the jack socket. The ground lug of the jack is the lug on the inner ring. If using a Switchcraft jack, this is where the brand stamping is located.

Thread a length of black cloth wire through the eyelet of the lug and solder this in place. If you are using heat shrink tubing, cover the lug with ½’’ of tubing and shrink it down. Repeat this process using the cream or yellow cloth wire for the tip (signal) lug of the jack.
This helps to create a more durable and longer lasting jack socket.

Connect the ground wire from the jack to the tone pot casing and the signal wire to the output (middle lug) of the volume control.
It is recommended (but not essential) to twist the ground and live wires together.

Braided Wire Alternative
In recent years here at Six String Supplies we now wire our Precision Bass kits using braided hook up wire. It is cleaner and quicker from our point of view - but does also have the advantage of being better at shielding from electro-magnetic interference. However, this advantage is minimal and is the reason why we recommend twisting the ground and signal wires together from the jack socket if using cloth wire. The act of wrapping the ground wire around the signal wire is close enough to the equivalent of the braided wire.

Braided wire is essentially two wires in one. The outer braid acts as our ground and the inner cloth wire acts as our signal.
Start by pulling the braid back away from the cloth wire and solder the inner cloth wire (signal) to the middle lug (output) of the volume control. You can use some heat shrink tubing here just to keep the braid tidy. You only need to pull the braid back half an inch or so.

We are going to be running the end of the wire straight to our jack socket but we will ground it to the side of the tone pot casing on the way through.

Finally, onto the jack socket. We like to cover the remaining wire to the jack in heat shrink tubing.
We need to remove some of the braid so you can either kink the wire and poke a hole in the braid (enabling you to pull the cloth wire through) or you can simply cut up along the braid for the same result.

Solder the inner cloth wire to the tip of the jack socket and the outer braid to the sleeve (ground) of the jack.

It is important to remember that both methods, cloth wire or braided wire are absolutely equal in performance - it really just comes down to your preference.
Connecting the pickup and ground
That’s the main controls finished – now you just need to connect your pickup.

Precision bass pickups have one ground wire and one “hot” or live wire. The hot wire needs to be soldered to the input lug of the volume control, whilst the pickup ground goes to the back of the pot casing.

Before everything is installed back into your bass and screwed down, you need to connect the main ground wire coming from the bridge. Again – put this onto the back of either pot. Refer to the below photos.


That's how to wire a Precision Bass. It is a very simple circuit using only two pots, a jack and a capacitor. There are other options to spice things up a bit, including using a 0.068uF capacitor in place of a 0.047uF. This gives a more traditional and darker sweep on the tone control.
Wiring Guides


