Here is our guide to wiring CTS push pull pots. Adding a push pull pot to your guitar opens up a new world of potential switching options and in this guide we cover some basic wiring mods you can try out and some easy to read diagrams (specifically covering CTS push pull pots).
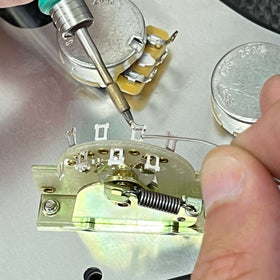
CTS push pull pots are slightly different to your typical push pull pot. Whilst being identical electronically, the DPDT solder points are in the format of a printed circuit board on the side, rather than on top as with a classic push pull pot.
This layout confuses many at first, but they are actually very simple to use and a superior component.

Instead of soldering to the solder points on a classic layout, simply solder to the lettered/numbered solder points on the PCB, C1, C2, 1,2,3,4.
How Do Push Pull Pots Work?

Push pull pots are essentially DPDT (double pole double throw) switches. So looking at the 6 solder terminals, C1 + C2 (C being "common") are always connected. When the push pull is in the down position, terminals 2 and 4 are also connected. When the switch is in the up position, terminals 1 and 3 are active. while 2 and 4 are switched off. This gives many options with guitar wiring!
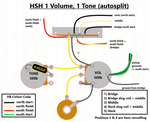
Below you'll find a range of wiring diagrams covering the most common push pull pot wiring mods for your setup, including coil splitting, series/parallel switch wiring and even how to use a push pull pot to act as both a volume and a tone control. To keep things simple and in the common interest, where applicable, the diagrams use Gibson humbucker 4 conductor wire colour codes.
Coil Splitting
Coil splitting is an extremely common mod which effectively shunts one coil to ground when the push pull pot is in the up position. You can read a lot more on coil splitting and how it works by reading our guide here. Your pickups need to be 4 conductor hook up wire and you will need to identify the respective start and finish wires of each coil.

Tone Control Coil Split
The below diagram demonstrates how we use coil splits as tone controls in our prewired kits.
 Partial Coil Split
Sometimes, a coil split seems to "kill" the pickup. This is because the 2 coils of the humbucker are not balanced. Instead of sending the signal to ground in our coil split, we can send it to ground via a resistor, also known as a partial coil split. The signal is partially sent to ground whilst enough is retained (blocked) by the resistor. This gives a more balanced coil split.

PRS Style Master Partial Coil Split
PRS make use of the coil split by using a master tone control which acts as a coil split for both pickups. This is achieved by sending the signal to ground via low value resistors as per the below diagram. You can play around with resistor values, but typically anywhere between 1.1k and 3.3k is what is used.

Series/Parallel
This mod allows you switch your humbucker from series to parallel and works really well with higher output humbuckers. Pickups that are wired in series will have a higher output as well as a fuller tone, on the other hand pickups wired in parallel will have a brighter sound but less output, giving you the best of both worlds. You can get some of that "quacky" tone and it really opens up the potential of your pickup!

Phase Switch
A phase reverse switch flips the polarity of the pickup - when this happens, the pickups become out of phase with each other. This mod works best with 2 humbuckers and the CTS pot below is wired for a tone control. The out of phase sound is very distinctive and truly adds something extra to your tone arsenal. This is our favourite mod.

Activate Treble Bleed
Like treble bleed (aka volume kits?) or not such a fan? Get the best of both worlds by wiring a push pull pot as per the below diagram. When the push pull pot is in the "up" position, the treble bleed kit is in use. Push the switch back down, the treble bleed is taken out of the circuit. This mod is useful if you want to A/B test quickly with and without a treble bleed to determine if you like it or not, before sticking with it or using your push pull pot for something else.

Volume/Tone Convert Mod
This setup allows you to use a single control as both a volume control and a tone control. This is extremely efficient if you only play with one control knob or are confined for space.

One Pot, Two Tone Capacitors
The below diagram and video shows you how to use a push pull pot to select between two different capacitor values whilst playing. For this be effective, it's best to choose a wide range between the two values...but obviously you can experiment and use whatever you prefer!

Killswitch
Whilst specialist kill switches exist, it can be done using a push pull pot too. The below diagram sends the signal to ground when in the "up" position. Our pickup is connected to the common lug (C1) and our output is connected to lug 2. This is active in the down position. However, when in the up position, our pickup is connected to lug 1, which we have connected to ground, thereby killing the signal.

One Pot Pickup Selector
Sometimes, simple is best. No switches, two pickups, one control knob. You can wire a push pull pot to act as a selector switch for your two pickups.

These are just a handful of wiring mods you can do using push pull pots - the possibilities are nearly endless! You can add just one push pull pot to your guitar or bass to give it an extra dimension, or you can go full throttle and stick 4 push pull pots in a Les Paul (not for the faint hearted!)
Push Pull Wiring Diagrams
Les Paul Coil Split (Tone Push Pull Pots)
Les Paul Series Parallel Wiring
Les Paul Coil Split (50s wiring)
Les Paul Junior (Series/Parallel)
